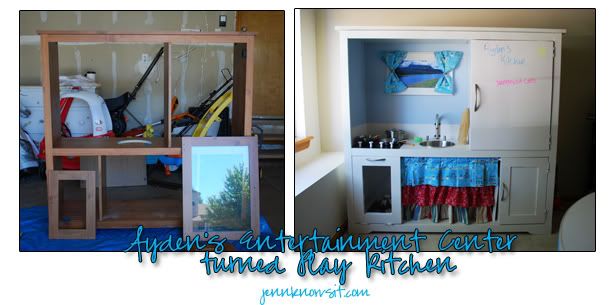
Summertime is coming to an end and every summer I always finish some DIY/re purpose project. Last summer I did a run down bench turned brand new and a run down picnic table turned perfect table for Ayden. This summer was finishing our daughters nursery and Ayden's play kitchen.
Ayden loves to play chef. Last year during a visit to my sister in Texas we went to Ikea and bought him all the pots and pans and felt foodies. He plays with those toys more than anything. Originally I thought oh I'll just get one of those used fisher price/little tikes play kitchen on craigslist or something. Um have you seen how much one of those things cost brand new and or used? Upwards of 50$ and more. That and they all look the same :/ not knocking anyone that has one but I had more in mind. Especially after seeing a couple of blogs with FANTASTIC entertainment stands turned into play kitchen. Remember back in the 90's when everyone had one. Well folks now its not good interior design so now it needs a new purpose a new life. I am not one to waste so hey I started checking craigslist every now and than in the FREE section. One day I saw a FREE one in the exact size/style I wanted and BEST of all it was disassembled meaning we could pack it into our small car whoohoo! It was meant to be! Below is the actual photo from the craigslist ad.
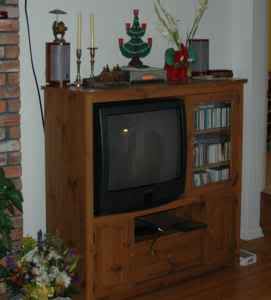
If you've read my blog before you know that I work at a pretty awesome place. Maybe not awesome to you but to me it is. I have some of the most awesome co-workers EVER. So I started telling them my ideas for this DIY play kitchen. Immediately they all wanted to pitch in and help. I had my friends husband cut the perfect hole for the sink. He also cut the hole for the oven see through door. The sink itself was a silver mixing bowl given to us by our good friend Jenn. See where I am going with this? Ask and it shall come!! The before....

I worked on it slowly. I decided to prime with Kilz Primer Spray took a couple of cans but it needed it.
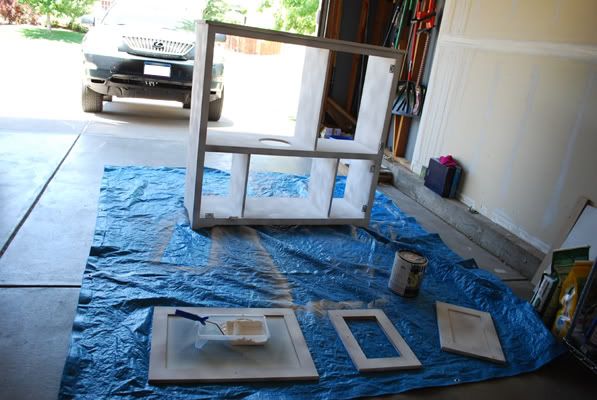
Not bad. Time for paint. Lucky for me I had a half gallon of SwanWhite primer/paint in one left over from our daughters nursery so I decided that would be the base. I know didn't I just say I primed the unit well better to be safe than sorry! I had to put like 3 coats on that sucker though. Hmmm maybe next time I'll just spend the time to sand it down...hahaha next time (dont think so!) I also was smart in that since I used the white as primer and white I only had to buy a sample container of blue paint for the backsplash!! its like less than 3bucks!!! And the backing on the original unit was that cardboard. I needed some plywood. Enter in another coworker Colette who donated two big pieces of plywood!!! See all done with the main paint!
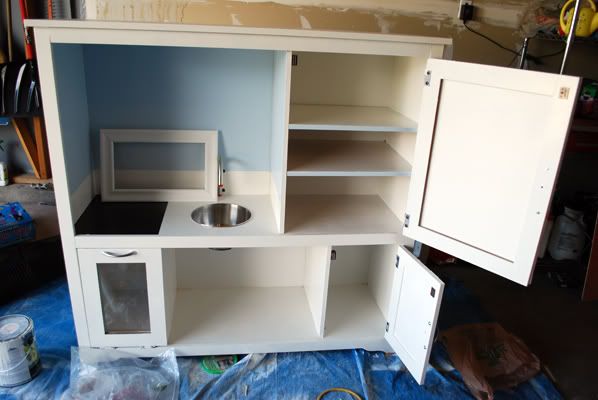
Just as I was getting all the paint done Ikea Centennial was OPENING! Whoohoo that means all the handles I needed and knobs I needed would be cheap and easily available. So I bought 2 sets of handles two for the bottom cabinets ($4.99) and oven and a set for the fridge ($7.99) Than finally the knobs for the stove top ($1.99) and lastly the "faucet" I dragged my friend Stephanie and she helped me look all over ikea for something that resembled a faucet and at the very end we found a Garage hook that upside down was the perfect sized faucet. Whopping price $0.99!
Total of $16 at ikea for the kitchen!
Hardware was coming together nicely now for the decorating. I needed curtains. But I was not going to get big curtains and cutting them down. Instead another talented and crafty coworker of mine (Jeanne) sews a lot and offered her sewing skills to me. All I had to do was buy fabric. I ended up only needed one yard of fabric at JoAnnes for $4.00! The fabric was perfect it had lots of little "kitchen" items on it. I found the pattern and directions on a fellow blog The Crafting Chicks. Perfection to cover the space underneath the sink to cover the metal mixing bowl. All I needed was a tension rod to fit the space (Lowe's for $2.99) She also used the leftover fabric to make two small tieback curtains for the faux window. The other pieces of fabric used she already had and it matched perfectly. I'd like to also add this was my first time in a fabric store looking at fabric and it was like a kid in a candy store. Ayden was with me and picked his own fabric for his apron and hat (coming soon). Also the oven door I needed plexi glass for, pshhh i found an old frame i didnt want any more and used the plexi glass from that and had my husband score it down to size!
I needed "burners" and found at the dollar store these red cup coasters perfect for burners!! I also found food shaped sponges for the sink there too! Yay $2 I decided to paint on a faux flat top stove and just glued on the burners. Paint again left over from another project of mine. Helps to be crafty folks.
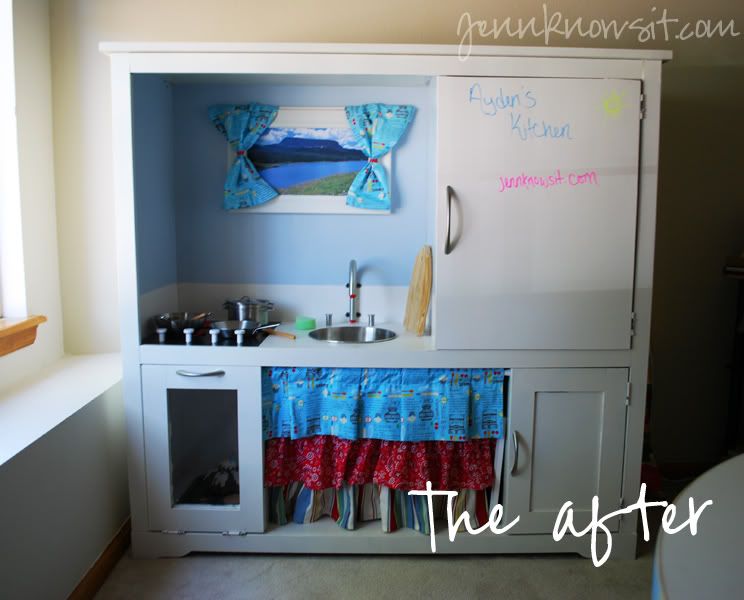
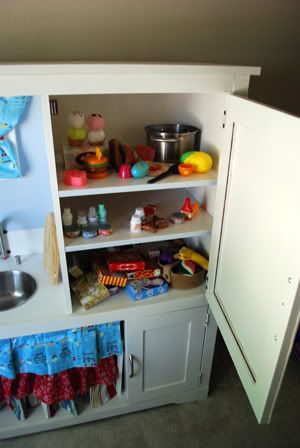
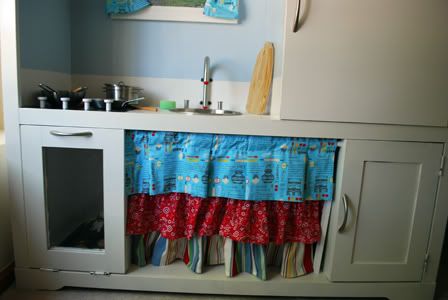
Whala Ayden loves it! Why wouldn't he. I wish my kitchen could look that awesome ;)
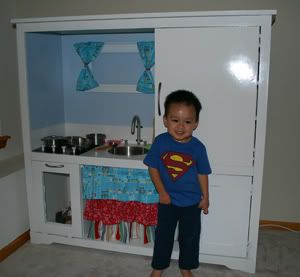
Lets run down the costs....
Entertainment center = Free
Sink = Free
Backing to unit = Free
Primer = $15.00
Paint = $3.00
Curtains = $4.00
Faucet = $1.00
Handles/knobs = $15.00
Burners/sponges = $2.00
Tension rod = $3.00
Sealant = $10.00
$53.00!!!!
Yes lots of man hours were put into this but it was a complete labor of love. I mean is it picture perfect maybe not but is it perfect for my kids heck yes! My neighbors all were like wow this crazy lady is dedicated to this white thing in her garage. Little did they know it would be this cool. Pretty sure my husband was hoping I'd give up half way through since it took up my garage for a month! It was all worth it. Anytime anyone comes over that hasn't seen his kitchen he drags into his play area and shows them ALL his goodies. All thats left is a play dinning set since Grandma gave him a dinning table/homework table. The fact of the matter is this. If I can do it you can do it too!
Notes if you do it:
Don't rush it. Rushing it costs you more money! I took my sweet time with this finding the right parts and you know what so many people were excited to help me. They were more than willing to come over and help and let me borrow tools etc. All i did was provide the food. Ask around for stuff and you'll be surprised how many people want to give you stuff that doesnt. The labor parts like cutting the hole I left to someone more experienced with a jigsaw and that worked out well. I let my husband bash out the glass after taping with ductape (to hold all the tiny pieces. Posted it on facebook and got fabulous comments.

No comments:
Post a Comment